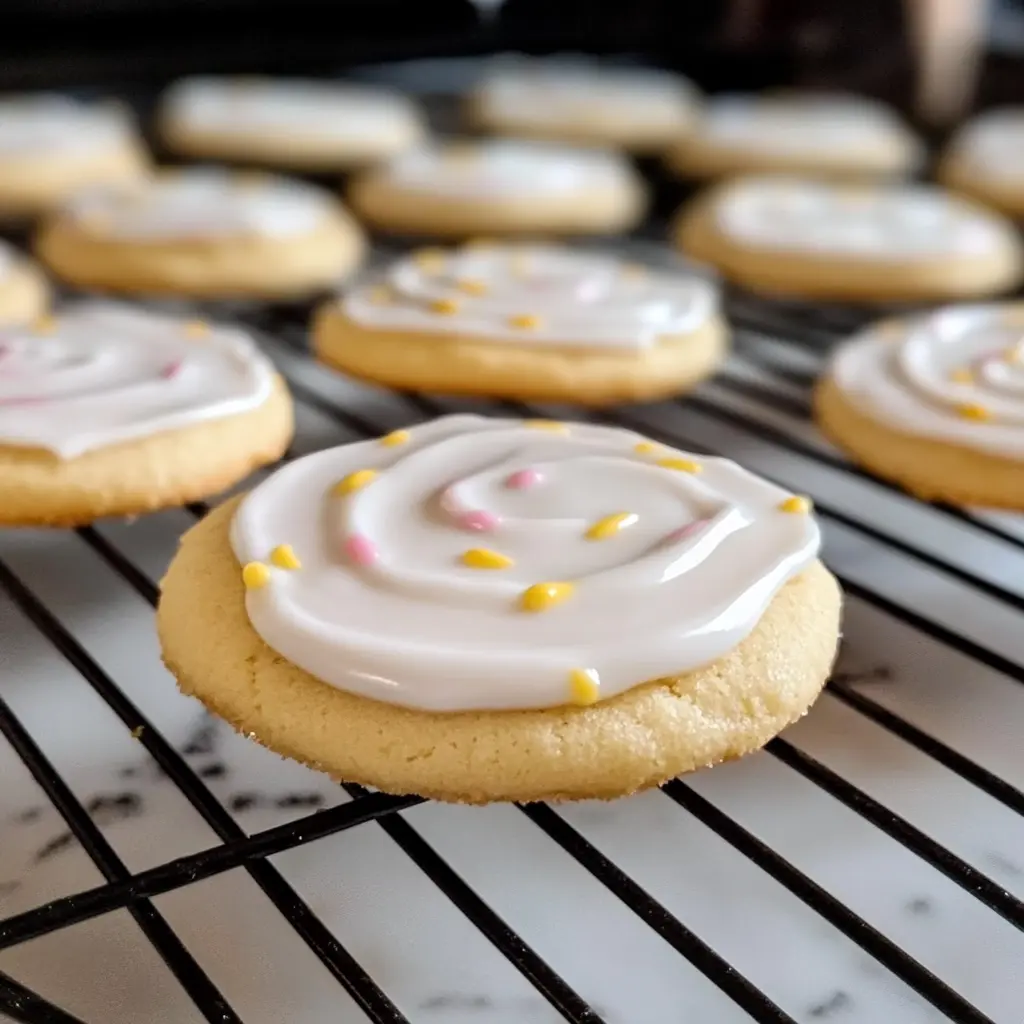
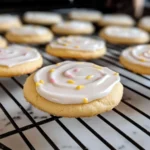
Sugar cookies are a classic treat that bring joy to any occasion, but the true magic lies in the perfect icing that tops them off. When it comes to sugar cookie icing, the goal is to achieve a smooth, shiny finish that hardens to a delightful crunch. With the right recipe and techniques, you can create a professional-looking sugar cookie masterpiece that will have your friends and family raving.
Table of Contents
The Ingredients for Sugar Cookie Icing That Hardens
The secret to creating sugar cookie icing that hardens lies in the perfect blend of simple ingredients. Let’s take a closer look at what you’ll need to whip up this versatile topping:
- 2 cups powdered sugar, sifted – This fine, powdered sugar is the foundation of the icing, providing the necessary sweetness and structure.
- 2 tablespoons milk, plus more as needed – The milk helps to thin out the icing to your desired consistency, allowing for easy spreading or piping.
- 2 tablespoons light corn syrup – The corn syrup is the key ingredient that gives the icing its signature hardening ability, creating a crisp and shiny finish.
- 1/2 teaspoon vanilla extract (or clear vanilla for a pure white icing) – Vanilla adds a delightful flavor to the icing, though you can opt for clear vanilla if you prefer a more vibrant white color.
- Gel food coloring, optional – For those who want to get creative, a few drops of gel food coloring can transform your icing into a rainbow of hues.
Step-by-Step Instructions for Hardened Sugar Cookie Icing
Creating the perfect sugar cookie icing that hardens is a simple process, and with a bit of practice, you’ll be decorating your cookies like a pro. Follow these easy steps:
- Combine Ingredients: In a medium bowl, whisk together the powdered sugar, milk, corn syrup, and vanilla extract until the mixture is smooth and creamy.
- Adjust Consistency: If the icing is too thick, add more milk a few drops at a time until you reach your desired consistency. Conversely, if the icing is too thin, gradually incorporate more powdered sugar until it’s just right.
- Add Color (Optional): If you want to add a pop of color to your icing, stir in a few drops of gel food coloring, mixing until the color is evenly distributed.
- Use the Icing: Once your icing is ready, spread or pipe it onto your cooled sugar cookies, creating your desired designs and patterns.
- Allow to Dry: Let the iced cookies sit at room temperature until the icing is fully hardened, which typically takes about 2-4 hours, depending on the thickness of the icing.
Tips for Achieving Perfect Sugar Cookie Icing
Mastering the art of sugar cookie icing that hardens takes a bit of practice, but with these helpful tips, you’ll be well on your way to creating professional-looking results:
- Use the right tools – A piping bag or a small spatula can help you achieve clean, even application of the icing.
- Adjust the consistency as needed – The icing should have a smooth, spreadable texture that’s not too thick or too thin.
- Store leftover icing properly – Keep any unused icing in an airtight container at room temperature for up to a week.
- Troubleshoot any issues – If the icing is too thick, add a bit more milk; if it’s too thin, incorporate more powdered sugar.
Decorating Ideas for Hardened Sugar Cookie Icing
The beauty of sugar cookie icing that hardens is its versatility. Whether you’re looking to create simple, elegant designs or intricate, whimsical patterns, the possibilities are endless. Here are some inspiring ideas to get your creative juices flowing:
- Flooding and Outlining – Use the icing to create a smooth, even base (flooding) and then pipe decorative designs on top (outlining).
- Seasonal and Themed Cookies – Customize your cookies for different holidays and occasions by using festive color combinations and motifs.
- Ombre and Gradient Effects – Experiment with blending colors to create stunning ombre or gradient effects on your cookies.
- Textured Finishes – Add visual interest by incorporating techniques like sponging, swirling, or stippling the iced cookies.
More Related Recipes You Might Enjoy
- Classic Sugar Cookies Recipe
- Royal Icing for Cookies
- Chocolate Chip Cookie Decorating Techniques
- Gingerbread Cookies with Icing
FAQs About Sugar Cookie Icing That Hardens
What ingredients make sugar cookie icing harden properly? The key ingredients that allow the icing to harden are powdered sugar, milk, and light corn syrup. The corn syrup is the secret to creating a crisp, shiny finish on the iced cookies.
How long does it take for sugar cookie icing to fully harden? Depending on the thickness of the icing, it typically takes 2-4 hours for the icing to fully harden at room temperature. The thicker the icing, the longer it will take to dry completely.
Can I use food coloring without affecting the icing’s hardening? Yes, you can absolutely use gel food coloring to tint your sugar cookie icing without compromising its ability to harden. Just be sure to add the coloring in small amounts and mix it in thoroughly to avoid affecting the consistency.
What’s the best way to store sugar cookies with hardened icing? Once the iced cookies have fully hardened, you can store them in an airtight container at room temperature for up to a week. Avoid stacking the cookies, as the hardened icing may crack or chip. If properly stored, your sugar cookies will maintain their crisp, glossy icing finish.
Conclusion
Mastering the art of sugar cookie icing that hardens is a game-changer in the world of cookie decorating. With the right ingredients and techniques, you can create beautifully finished sugar cookies that are not only a delight to the eyes but also a pleasure to bite into. So, gather your ingredients, get creative, and start baking up a batch of sugar cookies that will have your friends and family raving. The perfect icing is just a few steps away!
Looking for more tasty ideas? Visit Elena’s Fast & Flavorful Recipes on Pinterest for a treasure trove of easy meals, comforting bakes, and fun kitchen inspiration!
PrintCreate Perfect Sugar Cookie Icing That Hardens in 5 Easy Steps
Mastering the Art of Sugar Cookie Icing That Hardens
- Prep Time: 15 minutes
- Cook Time: 0 minutes
- Total Time: 2 hours 15 minutes
- Yield: 12 servings 1x
- Category: Dessert
- Method: Icing
- Cuisine: American
- Diet: Vegetarian
Ingredients
- 2 cup powdered sugar, sifted
- 2 tablespoon milk, plus more as needed
- 2 tablespoon light corn syrup
- 1/2 teaspoon vanilla extract (or clear vanilla for a pure white icing)
- Gel food coloring, optional
Instructions
1. Combine Ingredients: In a medium bowl, whisk together the powdered sugar, milk, corn syrup, and vanilla extract until the mixture is smooth and creamy.
2. Adjust Consistency: If the icing is too thick, add more milk a few drops at a time until you reach your desired consistency. Conversely, if the icing is too thin, gradually incorporate more powdered sugar until it’s just right.
3. Add Color (Optional): If you want to add a pop of color to your icing, stir in a few drops of gel food coloring, mixing until the color is evenly distributed.
4. Use the Icing: Once your icing is ready, spread or pipe it onto your cooled sugar cookies, creating your desired designs and patterns.
5. Allow to Dry: Let the iced cookies sit at room temperature until the icing is fully hardened, which typically takes about 2-4 hours, depending on the thickness of the icing.
Notes
Use the right tools – A piping bag or a small spatula can help you achieve clean, even application of the icing.
Adjust the consistency as needed – The icing should have a smooth, spreadable texture that’s not too thick or too thin.
Store leftover icing properly – Keep any unused icing in an airtight container at room temperature for up to a week.
Troubleshoot any issues – If the icing is too thick, add a bit more milk; if it’s too thin, incorporate more powdered sugar.
Nutrition
- Serving Size: 1 cookie
- Calories: 50
- Sugar: 10g
- Sodium: 5mg
- Fat: 0g
- Saturated Fat: 0g
- Unsaturated Fat: 0g
- Trans Fat: 0g
- Carbohydrates: 12g
- Fiber: 0g
- Protein: 0g
- Cholesterol: 0mg
Keywords: sugar cookie icing, hardening icing, cookie decorating